Shopify - How to connect Shopify to SEOPro AI?
Step by step details on how to connect your shopify store to publish blogs automatically.
Written By Founder@SEOProAI
Last updated Over 1 year ago
Once you are on the Shopify integration page in SEOPro AI. Go to the Settings Page on Your Shopify Store Page.
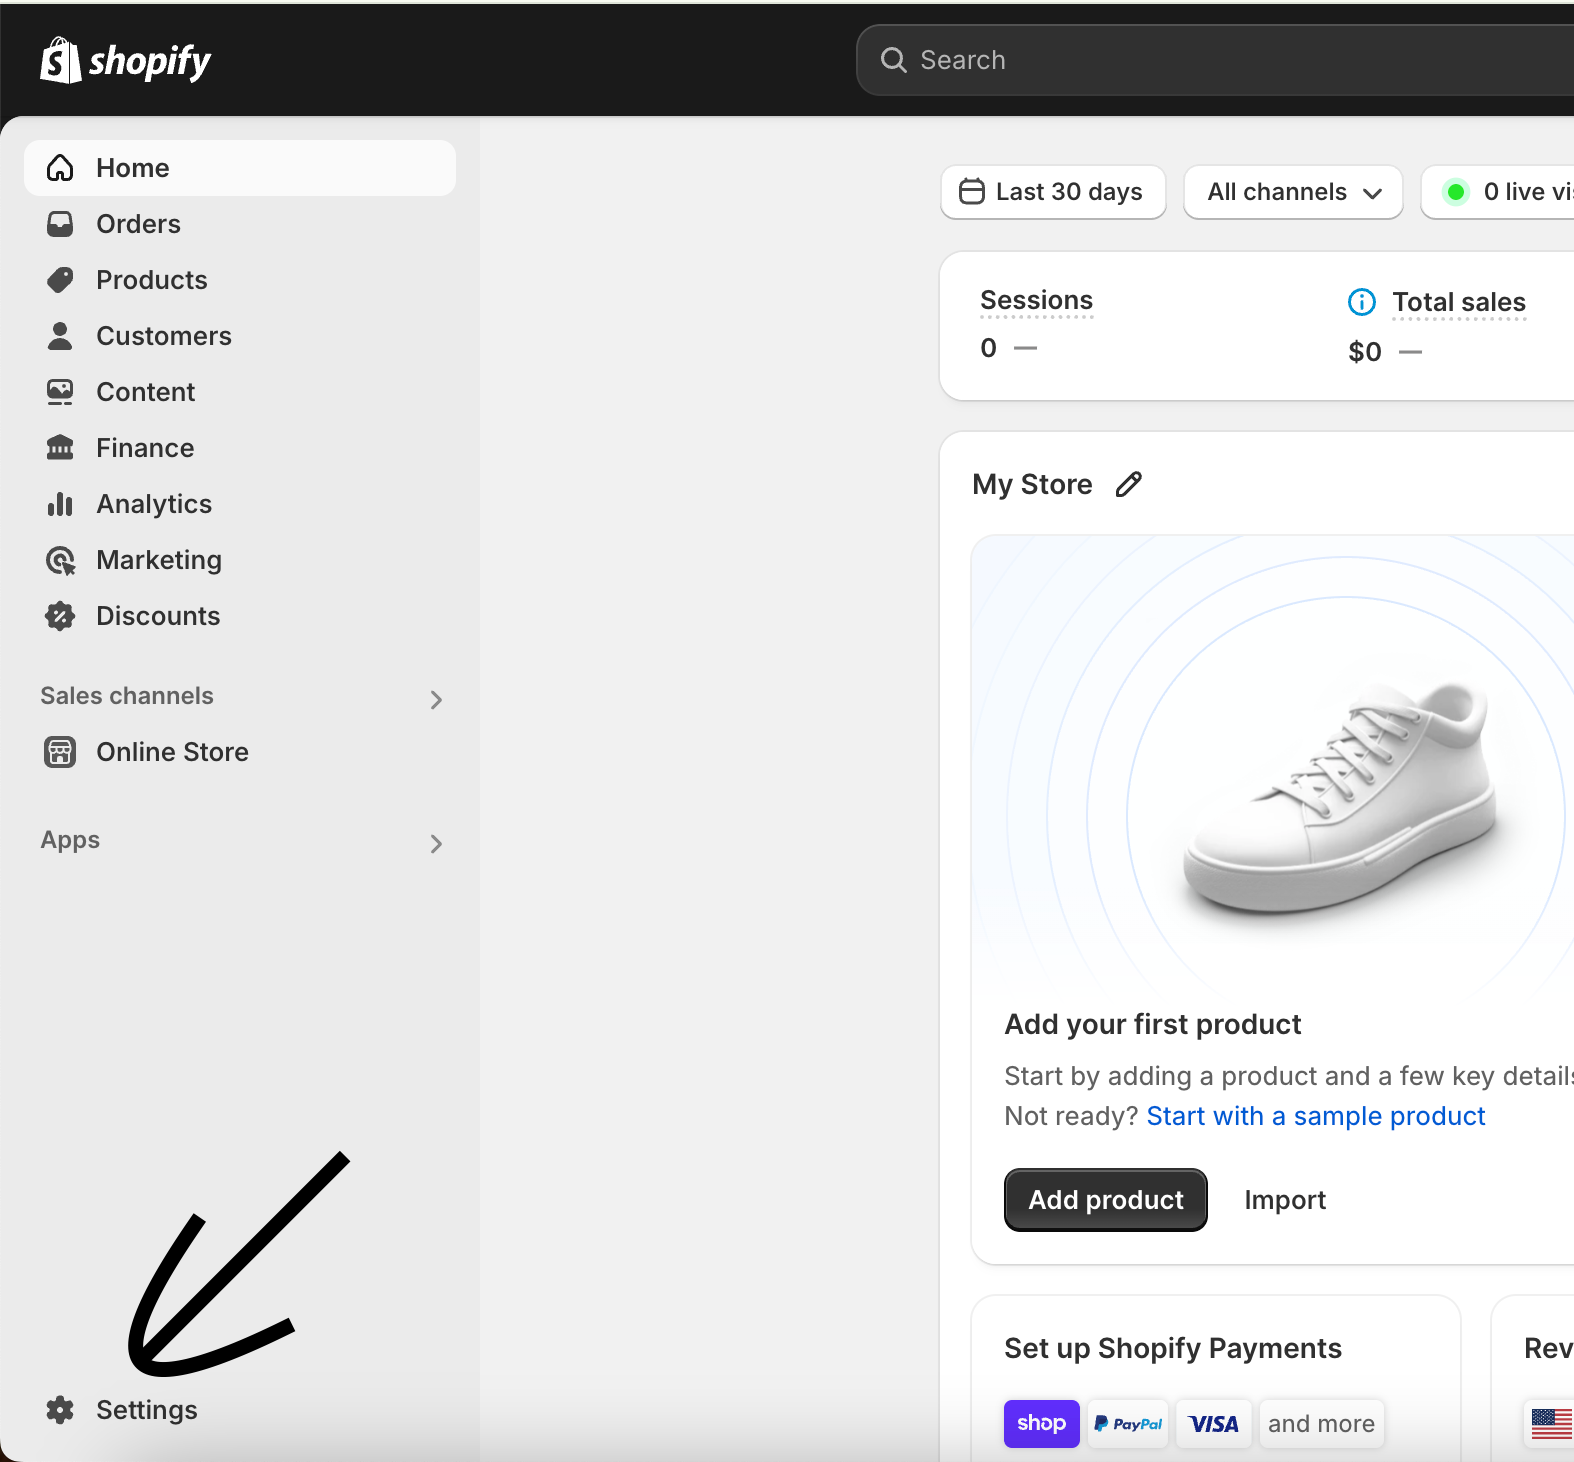
Shopify Integration Setup Instructions
Create a Custom App in Shopify
Go to your Shopify Admin → Apps and Sales Channels → Develop apps.
Click "Create an app" and give it a name.
Under "API Credentials", click on “Configure Admin API Scopes”
Search for Blog and add check (read and write) permissions.
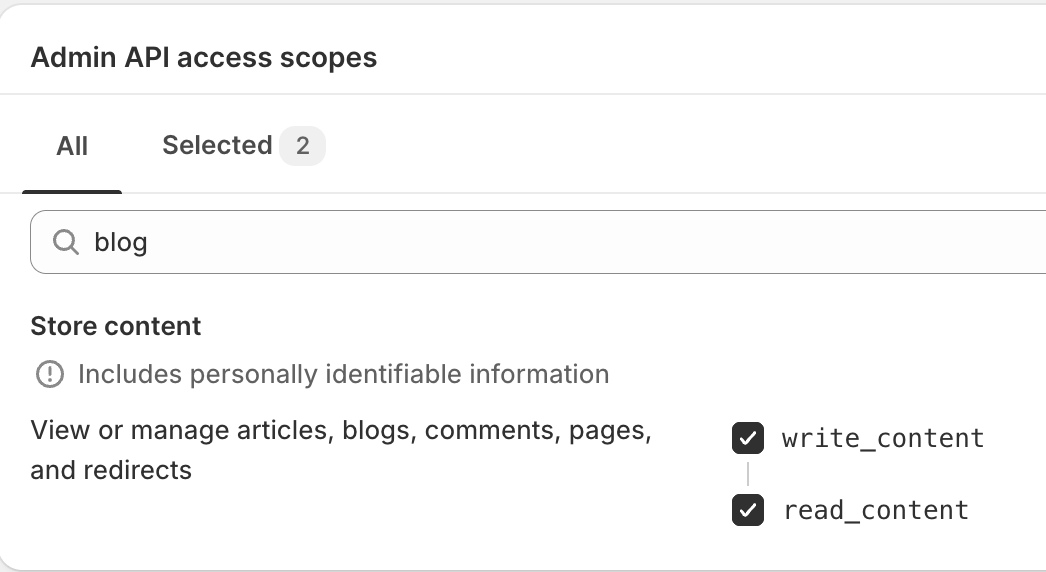
Click on ‘Save’.
Get Your Access Token
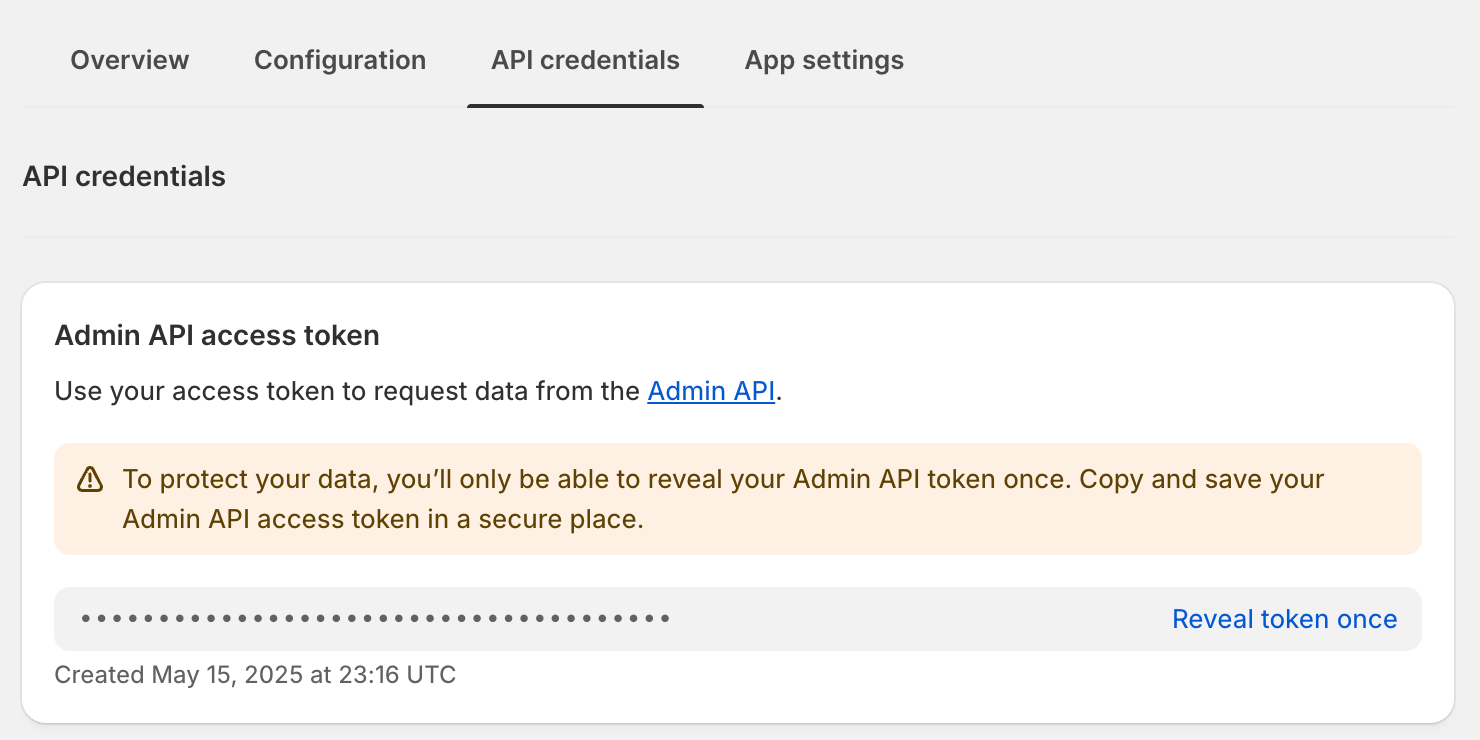
In your custom app, go to "API credentials".
Click "Install app" (if not already installed).
Copy the Admin API access token (starts with shpat_...). You’ll need this for the integration.
Find Your Store Name
Your store name is the subdomain in your Shopify URL:
For my-store.myshopify.com, the store name is my-store.
(Optional) Find Your Blog ID
If you have multiple blogs, you can find the Blog ID in your Shopify Admin under Blog Posts → Manage Blogs.
If you leave this blank, your default blog will be used.
Enter Details in the Integration Form
Store Name: Enter your store name (e.g., my-store).
Access Token: Paste the Admin API access token.
Blog: Select from the dropdown (if available) or enter the Blog ID manually.
Author Name: Enter the name to use as the author for published posts.
Verify and Save
Click "Verify" to check your credentials.
Once verified, click "Complete Setup" to save and finish.
Troubleshooting
If you get errors, double-check your permissions and token.
Make sure your access token is correct and has not expired.
If your blogs don’t show up, you can enter the Blog ID manually.
Was this helpful?
Still need help? Ask the team